Do you have a vehicle that has a spacious interior? If you do, then you should consider setting up a
roof mount DVD player. Installing this entertainment device is a great way to spruce up the interior of your car and improve the value of your vehicle. What's more, it makes travelling more enjoyable. When you have to travel interstate and you have nothing else to do other than see the scenery pass by, you can just pop a DVD into the player and watch your favourite film to better pass the time.
Buying a DVD player for your car is a joy these days. You can find a device with unique features that will make your viewing experience more enjoyable. As a matter of fact, you can even connect some of these entertainment devices to game consoles. But no matter which type of DVD player you purchase, it is always important to ensure that the device is installed properly in your vehicle.
Installation Hints and Tips

No 1. Identify the place where you want to place the
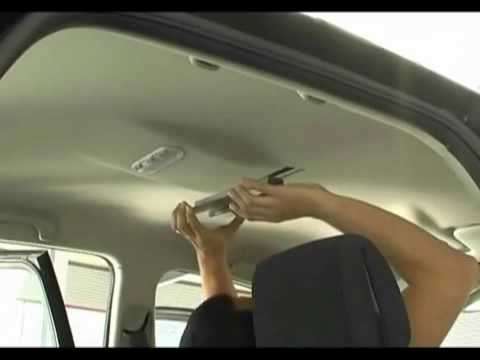
roof mounted DVD player. Then, create a cutting template that will serve as your guide when marking the spot where the part of the roof's upholstery should be removed. After deciding where to place the DVD player, cut the upholstery about the size of the device's mounting bracket. Afterwards, drill four holes (about one centimetre deep) on the exposed metal parts of the roof of the car. Attach the metal bracket to the roof and ensure that it is screwed in tightly.
No 2. Drop one side of the headliner to expose the wires in your car and locate your car's fuse box. Remove your vehicle's vanity light temporarily so you'll have more room to move. Afterwards, detach the lower and upper trim panels along the line of the sun visor. Unscrew the remaining clips, screws, and kick panel over the fuse box. Insert the extension lead into the space created by the metal bracket and pull it carefully until it reaches the area where the fuse box is located.

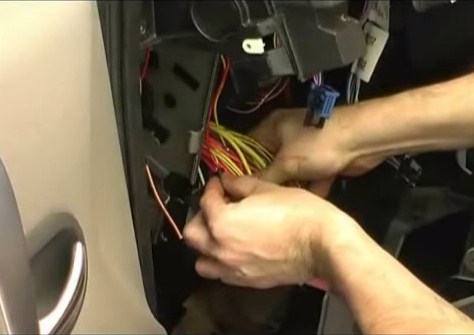
No 3. Connect one end of the extension lead to your car's power source. Then, wire the audio and the power wires of the DVD player. Attach the device's black wire to any grounded bolt or nut in your vehicle. Then, cut the ends of the audio and power wires and secure them with electrical tape. Conceal the wires behind the kick panel when you're done.
No 4. Reattach the car's lower and upper trim panels and the vanity light. Then, place the
car roof mount DVD player to its installation frame. Connect the other end of the extension lead to the monitor of the DVD player. When you're done, attach the installation frame and the DVD player to the metal bracket. Test the DVD player to see if it is working properly.
Always remember that an incorrectly installed roof mount DVD player can be a hazard to your car, yourself, and your fellow passengers. So make sure you follow the pointers discussed above. Meanwhile, if you're looking for quality DVD players,
visit Elinz Electronics.

 No 1. Identify the place where you want to place the
  No 3. Connect one end of the extension lead to your car's power source. Then, wire the audio and the power wires of the DVD player. Attach the device's black wire to any grounded bolt or nut in your vehicle. Then, cut the ends of the audio and power wires and secure them with electrical tape. Conceal the wires behind the kick panel when you're done.